
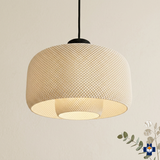

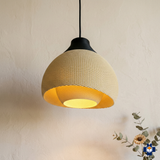


How to Install a 3D Printed Pendant Light Shade
DrMaker3DOne of the best things about a 3D-printed pendant shade is how easy it is to live with: most are lightweight, designed to fit standard fittings, and simple to install in a few minutes. This guide walks you through it step by step — no electrician's vocabulary required.
Safety first: Any time you're working near a light fixture, turn off the power at the switch — and ideally at the breaker — before you start. If your installation involves wiring a new fixture rather than just adding a shade, hire a licensed electrician.
What you'll need
- Your 3D-printed pendant shade
- A suitable LED bulb (see our bulb-safety guide — always LED, never incandescent or halogen)
- A step stool or ladder
- Optional: a soft cloth to handle the shade and keep it clean

Step 1: Turn off the power
Flip the wall switch off. For extra peace of mind, switch off the breaker that controls the fixture. Confirm the light won't turn on before you touch anything.
Step 2: Check your fitting type
Most pendant shades attach in one of two ways:
- Bulb-fitter shades slide over the bulb socket and are held by a ring or by the bulb itself.
- Cord/canopy shades thread onto the pendant cord or clip to the existing fixture.
Our product pages list the fitting each shade is designed for (commonly E26/E27 sockets in the US). If you're unsure which you have, take a photo of your existing fixture and send it our way — we'll help you confirm.
Step 3: Remove the old shade (if there is one)
If you're replacing an existing shade, gently unscrew or unclip it. Set it and any small hardware aside somewhere safe.
Step 4: Fit the new shade
Position your printed shade over the socket or onto the cord, following the fitting type from Step 2. It should seat evenly and feel secure without being forced. Because printed shades are light, they don't put stress on the fixture — but you still want a snug, balanced fit so it hangs straight.
Step 5: Add your LED bulb
Thread in a low-wattage LED bulb (around 8–10W or less for an enclosed shade). LEDs stay cool, which protects the plastic and keeps your shade looking great for years.
Step 6: Restore power and test
Turn the breaker and switch back on. Your new pendant should light up with a warm, statement glow. Step back and check that it hangs level — a small adjustment now saves you looking at a crooked shade later.
Troubleshooting quick tips
- Shade sits unevenly? Re-seat it and make sure it's centered on the socket or cord.
- Bulb too bright or too harsh? Swap to a lower-wattage or warm-white (2700K) LED.
- Not sure it fits your fixture? Measure your socket and check the product page, or message us before installing.
Enjoy your new look
That's it — a brand-new, one-of-a-kind ceiling feature in about the time it takes to make a coffee. Explore more styles in our Pendant & Ceiling Lights collection, and remember: when in doubt, reach out and we'll help you get it right.


